On the unRaid forums recently, I was responding to a user who was asking why his VM gcow2 image did not shrink when files are removed (thread here). I advised that auto-shrink is not standard behaviour, and in the discussion, it became clear that the use case was security camera footage. The user figured out that perhaps saving video files to a network share would be better than to the VM boot / system drive, and I mentioned that I do this with my BlueIris setup. I promised a quick guide, so here it is....
I run my BlueIris application in a Windows 10 VM on unRaid. While what follows is specific to my set-up, the general principles would apply to any VM OS and application software.
In my BlueIris 'Clips & Archiving' settings, I have new footage set to save to the local V: drive;

After 2 days, clips are moved to the 'Stored' location, an unRaid share, where they are maintained for 2 weeks;

These locations exist in the VM's Windows Explorer as a locally mounted drive and a network volume respectively;

And the W: drive is an unRaid share;

I use the network path to the share in BlueIris rather than the W: drive letter as I found it to be more reliable. However, you can see from the above that it's possible to map an unRaid share to a network volume inside a VM.
To do this, simply go to File Explorer, click on the 'Network' left menu item, open your unRaid server, right-click on the desired share and select 'Map Network Drive' from the contextual menu. This will open the mapping dialog. Assign a drive letter and be sure to tick the 'Reconnect at sign-in' if you want the share to persist between VM restarts. Click finish. You'll need to enter your unRaid user password and you're done.

So that's how everything is configured in a Windows VM, and the principles are the same if your VM is Linux or MacOS, but what about on the unRaid side? What do you need to do to set it up so that the VM can access these disks and shares?
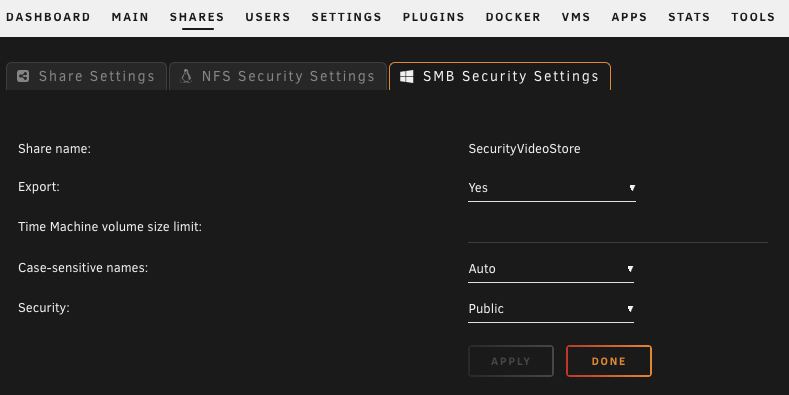
Well, there's nothing more to do on the network share side. Provided that the share is set up and exported to SMB, it will be available to any systems on your network, including VMs. Here's the key setup pages in unRaid for the share I've referenced above;
 |  |


And that's it. Once you do this, the disk image will appear as an unformatted disk when you boot the VM. Format it, add a drive letter (for windows) and the disk works just like a physical disk inside a real PC.

I've highlighted the 4TB Hitachi disk we saw in unassigned devices earlier. This is the disk I want to pass into my VM.

No comments:
Post a Comment